Lightroom Classic- Apply Develop Adjustments automatically at Import (last updated Sept 4, 2022)
Having Lightroom Classic apply standard develop presets is an enormous time saver. For those that would prefer not to apply develop adjustments to each image, or if your like me and prefer the final cull to have adjustments applied before making a final selection applying a develop preset at import time is a great time saver.
Lightroom CC can automatically set standard (default) adjustments (basic tone, colour, texture, sharpening etc.) for each camera and apply customized noise reduction based on the ISO of each shot. Typically only noise reduction is adjusted by ISO but Adobe allows any setting to be included.
This really cuts down on time and effort in post processing. I find that ‘triaging’ shots that are processed in this manner much easier and faster- especially when comparing thousands of similar wildlife shots a day.
Its also worth noting that sharpening and noise reduction are really based on the sensor – in theory sharpening and noise adjustments are the same for each shot from the same camera body with adjustments for specific ISO. This assumes that you are following best practice sharpening processes, first sharpening at import, tweaking the sharpening for a few ‘best’ images (artistic sharpening) then applying specific output sharpening at print or web output time.
For example: for an image shot on a Sony A7 RIII at ISO 100 I use :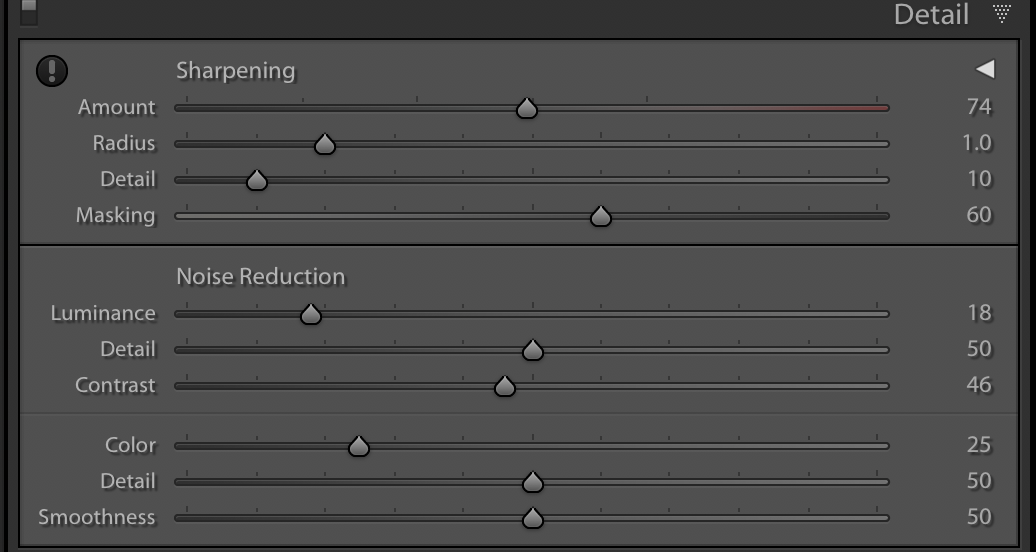
While at ISO 6400 I use the following – with stronger masking for sharpening and higher noise reduction (all quite dependent on the camera sensor so don’t copy my settings).
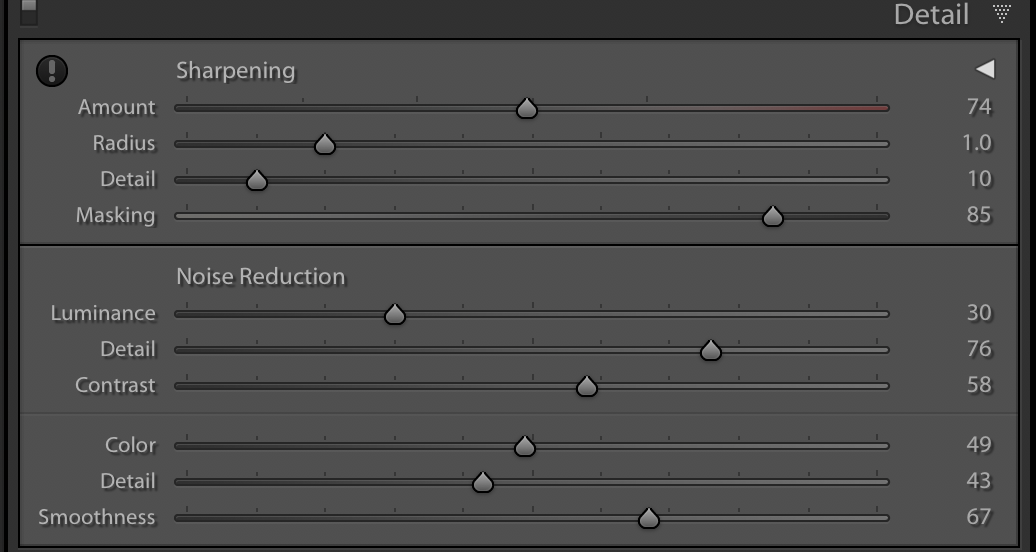
To have Lightroom apply intermediate levels to each ISO perform the following two step process.
Step 1
First select two images with a range of ISO’s. I used one shot at ISO 100 and another at 6400 as this is covers most of the standard ISO settings I use when shooting. These two shots would typically have identical import settings except for Noise Reduction which varies by ISO.
Now create an Adaptive ISO Preset which will alter the noise reduction/sharpening so that it is incremented equally across the ISO range you selected ( in my example 100, 125, 160 … 6400):
– In the Develop Module, go to the preset panel on the left and hit the + to create a new preset
– With the two images selected (100 & 6400) select the settings that would be typically included in any import preset as per the example below.
– Make sure to select “Create ISO adaptive preset” at the bottom of the preset window
– Save the Preset with a name that identifies the camera and ISO range.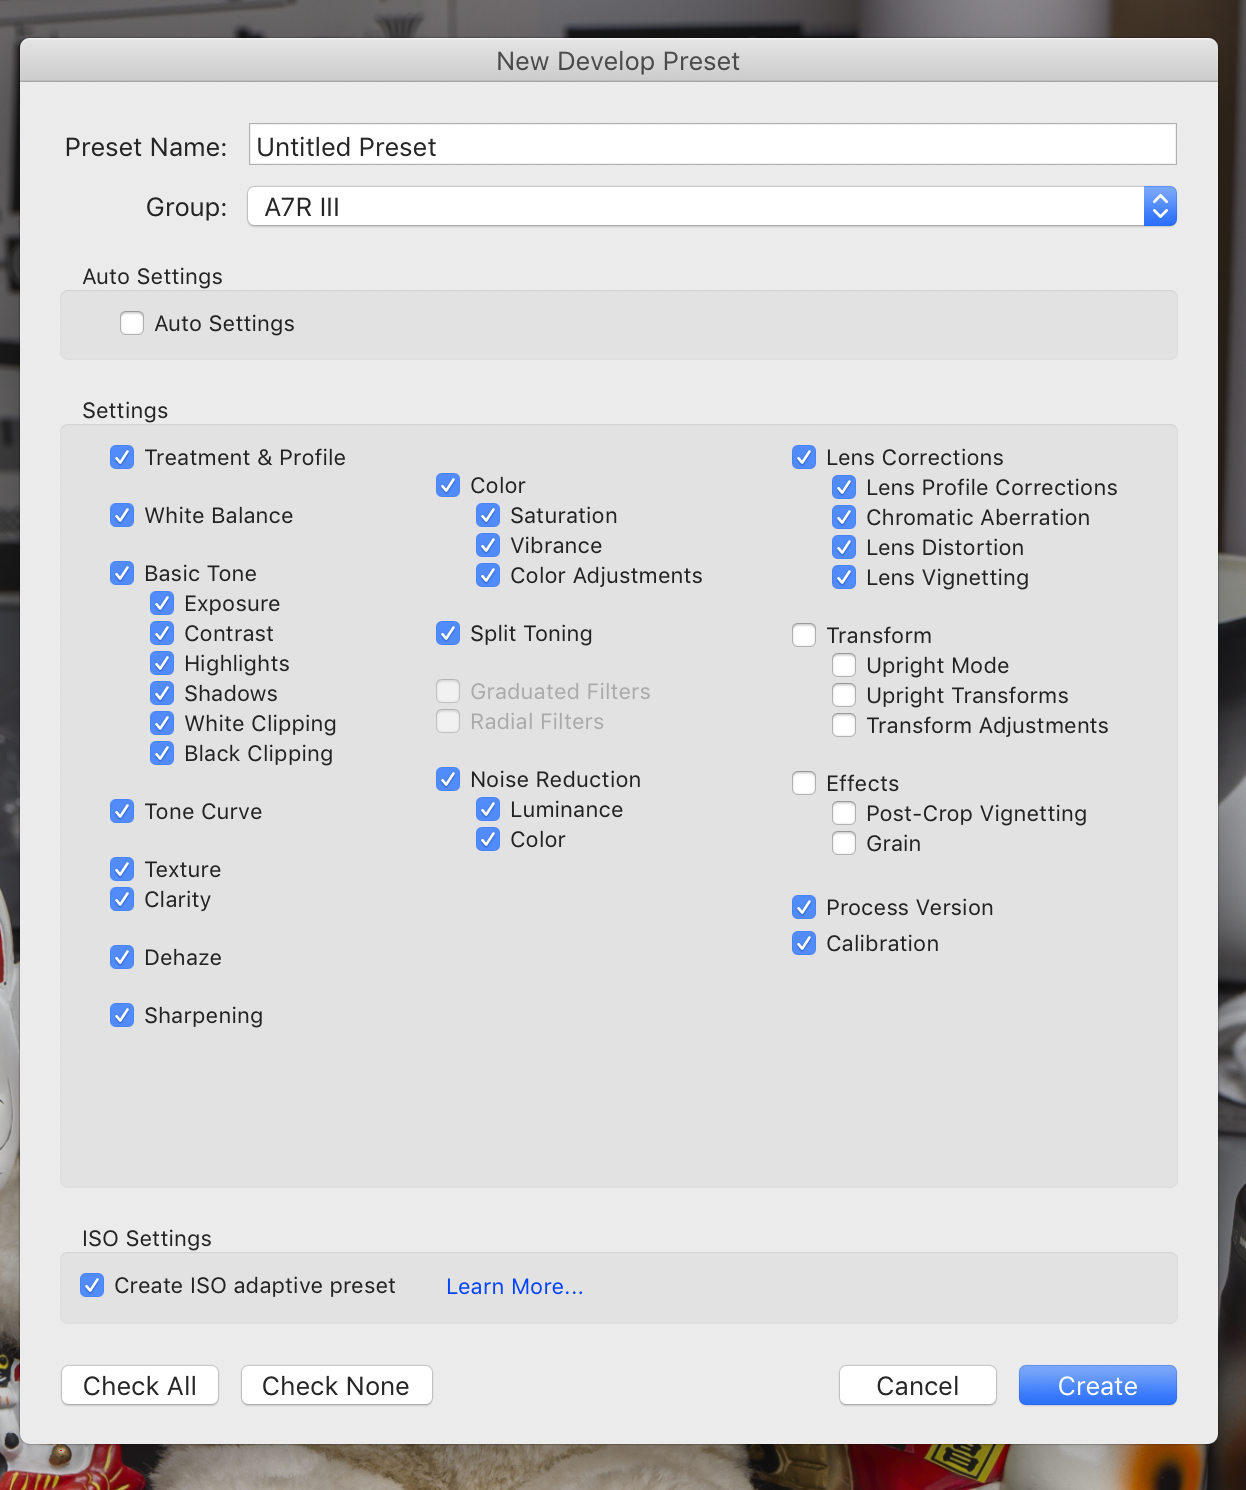
Step 2
Now set Lightroom CC so that it uses that new preset at import time:
Within Preferences>Presets Tab:set the following:
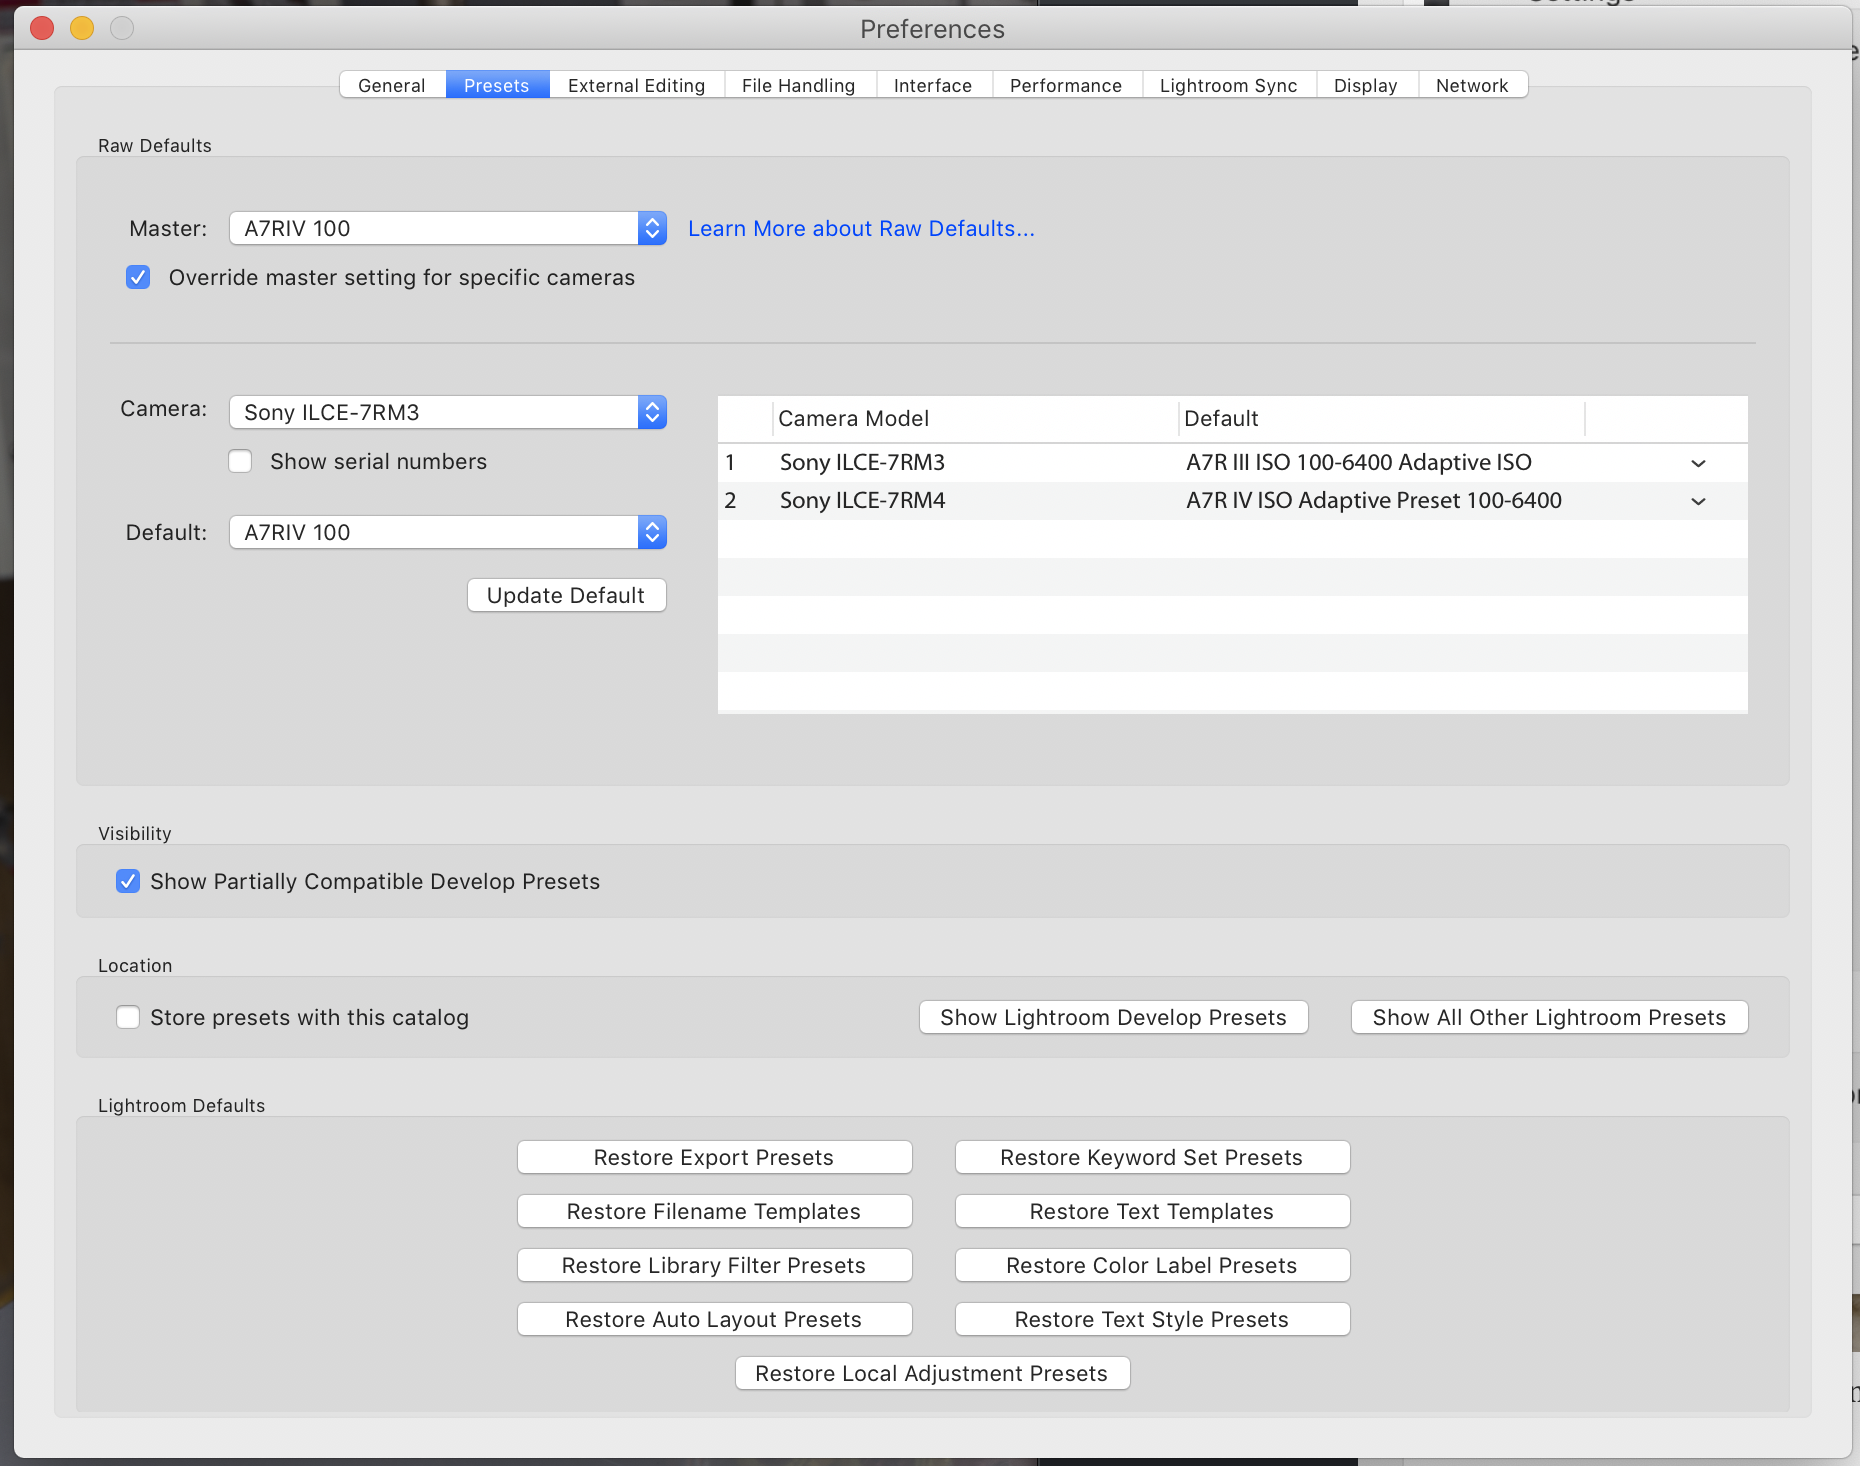
Master: This is your default for any setting that is not subsequently defined in other subsequent presets. You therefore could set most of the desired settings in Master and then just override noise settings by Camera and ISO.
Override master setting for specific cameras must be selected.
Then select the Camera and click the Update Default which will then add the camera model to the right hand box.
From this right hand box select the preset created from step 1.
Do this for each camera.
At the end of the process, the window with Camera Model and Default should display the Adaptive Preset for all cameras you have set.
