http://www.ilounge.com/index.php/articles/comments/the-complete-guide-to-album-tagging-art-and-playlists-in-itunes/
- Name: Name of the Album
- Artist: Artists name of the Track or if the Album is all from one Artist, use Album Artist field and leave this blank
- Album Artist: This field is used for the name of the artist for the album as a whole, and is useful for tagging tracks from albums that have guest artists or featured artists in certain tracks. For single-artist albums, it is usually either blank or will be the same as the Artist field for the track. This is used primarily for grouping and sorting of tracks, particularly in the Grid and Cover Flow views. Recent versions of iOS can also optionally use this field to group tracks in the artist listings on the iPhone, iPod touch and iPad.
- Track Number: This is a two-part field to list the track number and total number of tracks for an album. This is important for sorting in iTunes and on the iPod to list tracks in their proper album order. If this field is blank, tracks are sorted within each album alphabetically instead.
- Disc Number: IMPORTANT for multi disk albums Similar in concept to track number, this is used for multiple-disc albums, and is used in conjunction with the track number to sort tracks in their proper order when viewing an album listing for multiple discs. This allows you to use the same album name for all discs in a multi-disc set while still having them sorted correctly. iTunes will then put one album cover for multiple disks if the album name is the same.
- Grouping: This tag is primarily used for classical pieces to group movements of the same work together during playback. For example, if you had a recording of Beethoven’s Fifth Symphony, each of the four movements may be listed as an individual track with the title of the movement itself as the track name and “Beethoven’s Fifth Symphony No. 5 in C minor, Op 67” in the Grouping field.
- Year: This normally contains the year the track or album was produced. In many cases tracks downloaded from the iTunes Store or CDDB will list the year the album was produced regardless of when the original song was produced. This can be used for sorting in iTunes and is also displayed on the Apple TV. It is not shown at all on the iPod or iOS devices.
- Options: Part of a Compilation
To assist Find Album Artwork with Google script is available from Dougs http://dougscripts.com/itunes/scripts/ss.php?sp=findalbumartwork
Note: on July 9 2014 I started this new post describing shutdown problems – if you are running anything before 10.9.3 see: http://jeffgardner.ca/Blog/?p=751
This new post describes the problems with 10.9.4 as of July 9, 2014.
Current Situation:
The Areca 8050 will not shut down properly if the Mac Pro is Shutdown. Instead, the fan on the 8050 runs on high and it appears to be shutting down but does not.
1) The Mac Pro sleeps normally as of 10.9.4 if I manually use the Sleep command from the menu or if the timeout from the system preferences takes effect.
My current Energy Saver setting:
2) When the Mac Pro goes to sleep, so does my Areca 8050 Raid 5 – 21TB Drive. There are no more crashes during the night with sleep/wake kernel panic.
3) The Nec 27″ using two DP now sleep wake properly as well.
Current Configuration
Mac Pro 2013, 6 Core / 64GB / 1TB SSD / D500
Two NEC 27″ – Mini DP connect to MacPro directly
1 Pegasus R4 Thunderbolt V1 – 8 TB Raid 0 (4x2TB) – latest firmware
1 Areca 8050 Thunderbolt 21TB Raid 5 (8x3TB) – latest firmware
1 Anker USB 3.0 9-Port Hub with 5V 2.1A Charging Port hub VL812-B2 Chipset and updated Firmware 908
All Apple Thunderbolt cables attached to Mac Pro – not daisy chained from other TB drives
Mavericks 10.9.4 – created from clean install of 10.9.1
So things are better but I have to manually shut down the Areca 8050.
Using a “Kill a Watt” measuring device.
I plugged the UPS power cord into into the Kill A Watt and took measurements
| Computer Running Idle | Sleep | Pegasus R4 | Pegasus R4 & Aerca | Mac Pro Net | ||
| Just UPS | With 2 Drive Units Running | UPS fully charged | UPS Fully Charged | UPS Fully Charged | UPS Fully Charged | |
| MAC Pro 2013 | 38 Watts | 234 Watts | No possible at this time | 80 Watts | 108 Watts | 126 Watts |
| 4 Internal Drives | ||||||
| Mac Pro 2009 | 20 Watts | 181 Watts | 107 Watts | na |
Without sleep mode on the Mac Pro 213 I am burning through about 234 watts unnecesarily if I forget to shut down.
Thats not to mention that I still have the Mac Prol 2009 running – usually idle.
Over the years I have developed preferences for how my machines are configured. Every time I get a new machine or reload the OS, I have to remember to make the following changes, so I finally decided to document them to make the job easier:
Old Mac:
First if selling an old Mac here is what I need to do:
- Remove any licensed software
- Deauthorize any iTunes for this computer
- Use Disk Utility and erase all drives other than the Macintosh Drive – I only use one pass to do this
- Reboot Cmd+R and use Disk Utility to erase the Macintosh Drive
New Mac: updated April 2021
0) Turn on Firewall
1) Accessibility > Display > Cursor Size > Larger
2) Desktop & Screen Saver > Hot Corners … > Put Display to Sleep
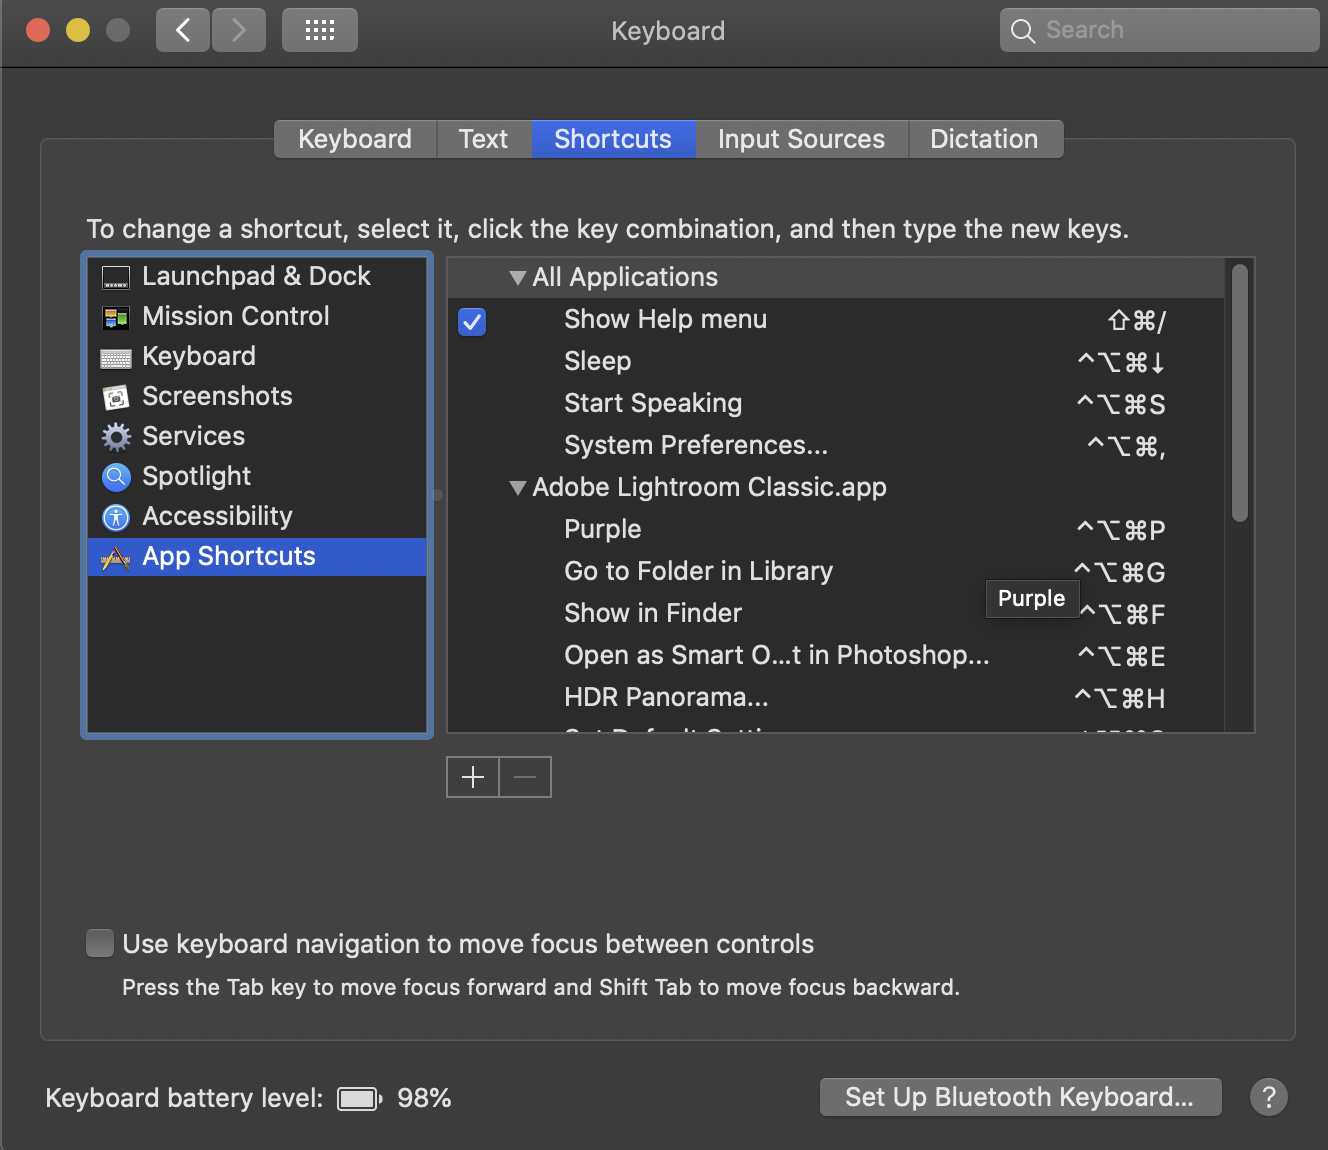
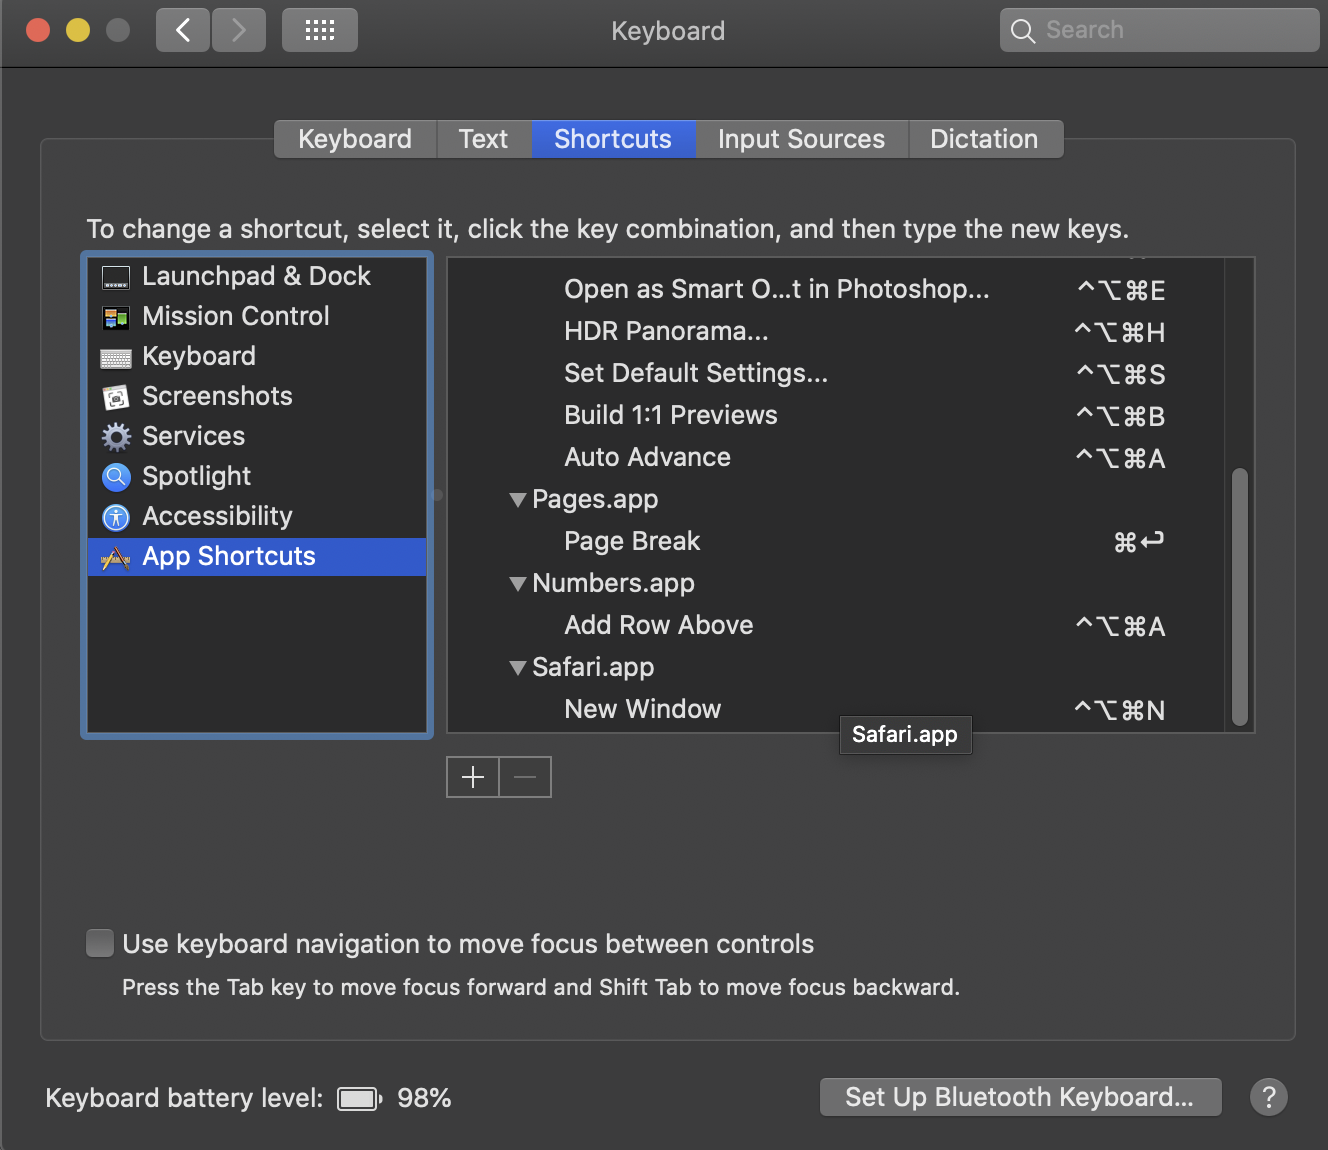
3) Keyboard > Shortcuts
Show Keyboard views in menu bar
Modifier Keys – Caps Lock:No Action
App Shortcuts:
All Applications > Sleep ^?
Move to Studio Display (1) ^ option left arrow
Move to Studio Display (2) ^ option right arrow
Pages.app > page Break ^ Enter
Adobe Photoshop Lightroom
Build 1:1 Previews ^\CB
Purple ^\CP
Open as Smart Object in Photoshop…
4) ICC profiles from previous machine: ~/Library/Color Sync/Profiles/JG Profiles
6) Photoshop Color Space, Lightroom Configuration and ACR
7) DHCP by mac address
8) Pages Templates – drag from old version to Pages Icon to be prompted to save the template
9) Capture Print Presets and ICC profiles
10) Mail Font settings – see Preferences, Fonts Helvetica 18
Also Mail>Preferences>General>New Message Sound:None
11) Preferences > General > Highlight Purple, Show scroll Always, Ask to Keep, Close Windows, Recent 30
12) Keyboard Preferences > Mission Control – Turn off F12 Show Dashboard since F12 is better used by Photoshop
13) If some Apps start running automatically, in the Dock hi light the icon, press option and turn on “Start at Login” then turn it back off.
13.1) Preferences>General>Automatically hide menue bar off
13.2) Preferences>Date & Time>Clock tab>Show Date
14.1) Finger Print Reader setup
14.2) G-Raid Shuttle: Driver and Program: https://support-en.sandiskprofessional.com/app/products/product-detail/p/2377#WD_downloads
14.3) My Standard Software:
1Password
a7Info
AstroPad
Audacity – optional
Adobe Creative Cloud – Classic
Black magic Disk Speed Test
Brother P-Touch Editor
Optional: Carbon Copy Cloner – export all tasks then import
Clip Grab – free download from their web site
Copyless2
Contexts (alt-tab)
Compare Folders
datacolor
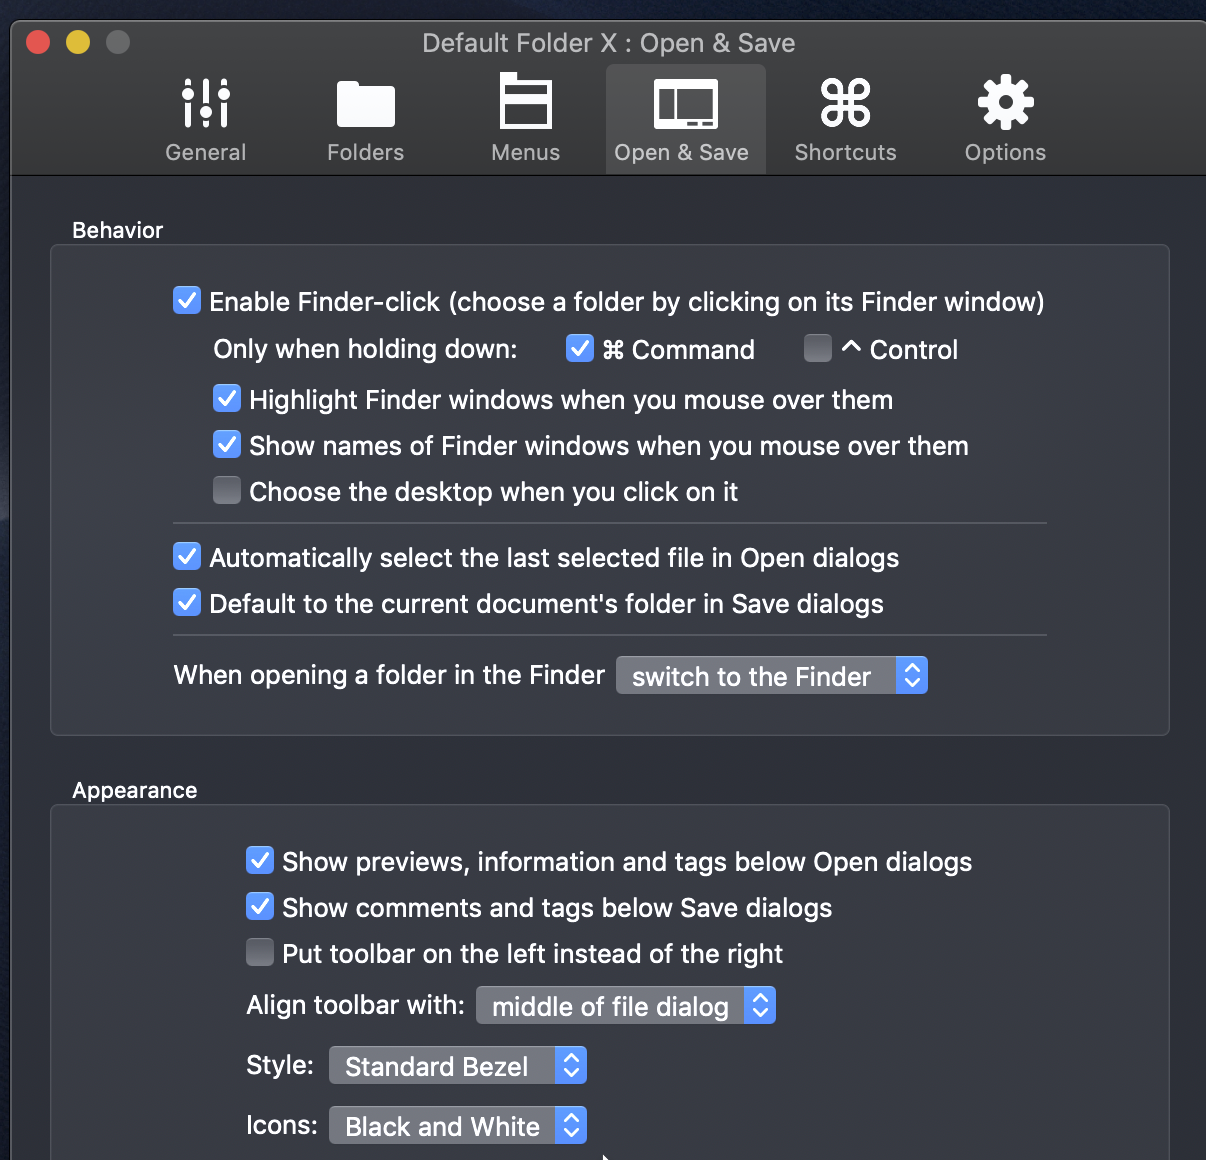
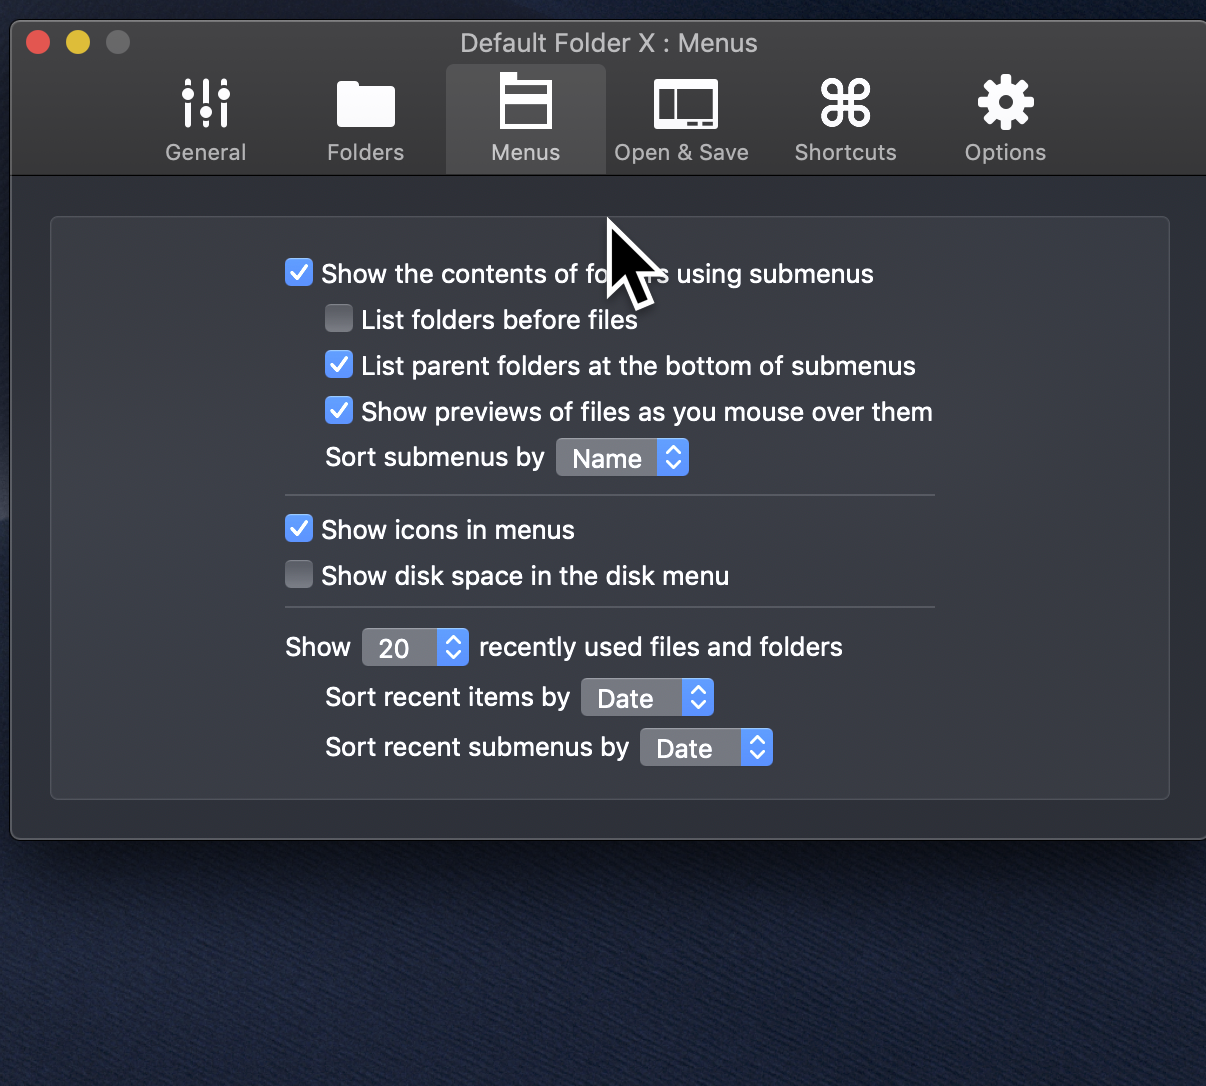
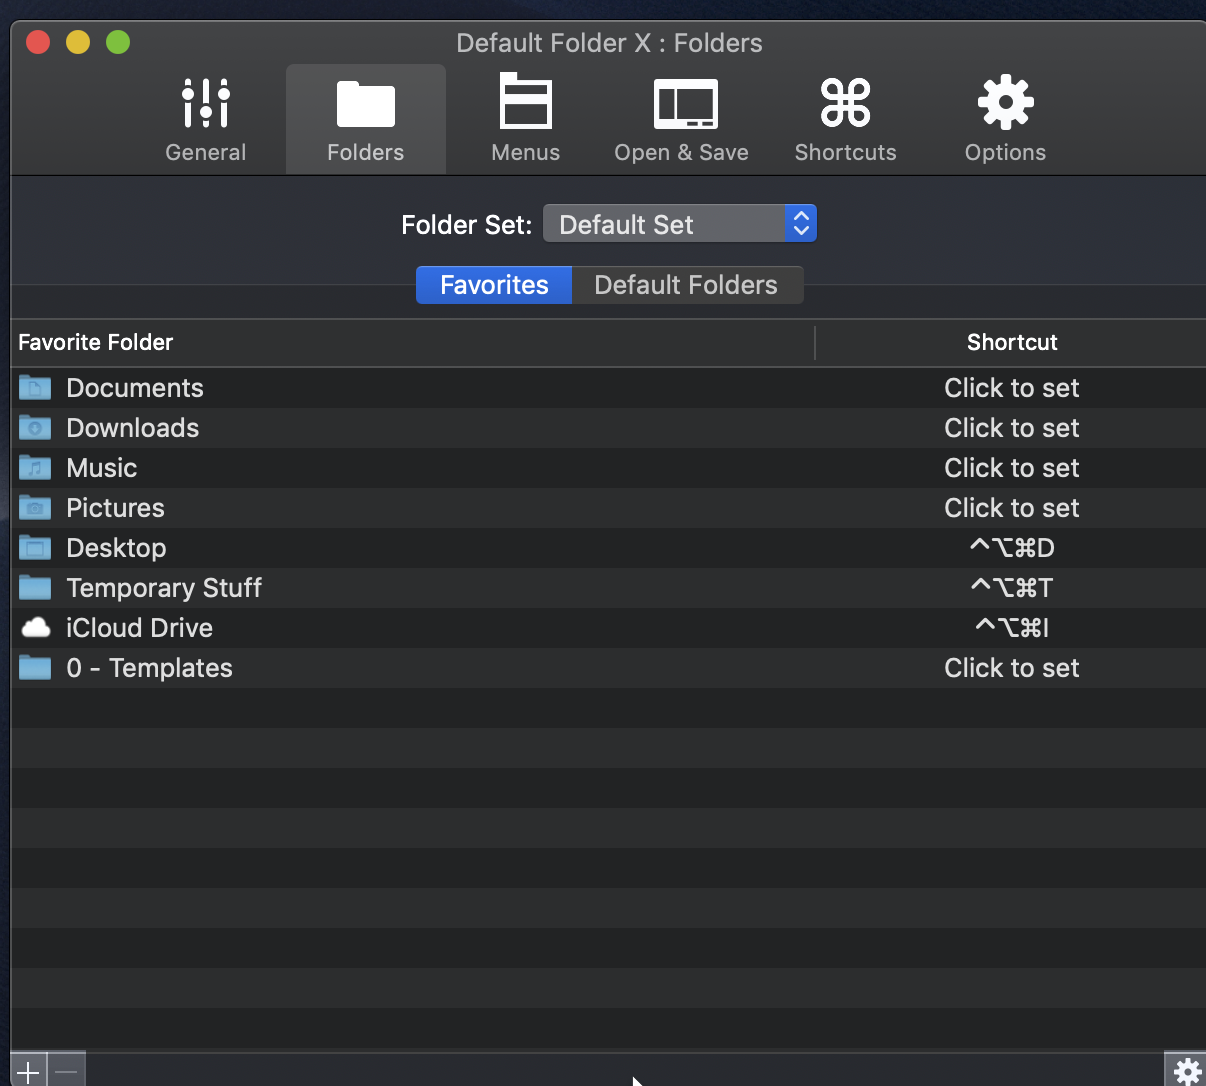
Default Folder
DxOPureRaw
Easyfind
FastrawViewer 2
G-Raid Software Utility
Image Edge (Sony)
Keynote
Library/Application Support/Adobe/Lightroom/ select presets (be selective)
Mail
Neat Image Presets and Camera Calibration
Neat Image V9
NIK Collection
New file menu
P-touch Editor
Pages
Templates: Finder > Menu > Go > hold down option key > LIbrary
/Library/Containers/com.apple.iWork.Pages*/Data/Library/Application Support/User Templates
* When you get to apple.iWork.Pages you will need to right click on the file > Show Package Contents
Lightroom – including presets (source: click and show in finder)
Rectangle (screen position)
Roon
Scansnap
Simple Mouse Locator (App Store)
StarryLandscapeStacker (not now)
Speedtest
SpyderXUtility
Spydersheckr 24 http://goto.datacolor.com/download/checkr24
Tidal
Topaz Labs (Topaz Glow\Topaz Studio / Impression / Gigapixel
Wondershare Filmora x
Zoom
Keyboard Shortcuts
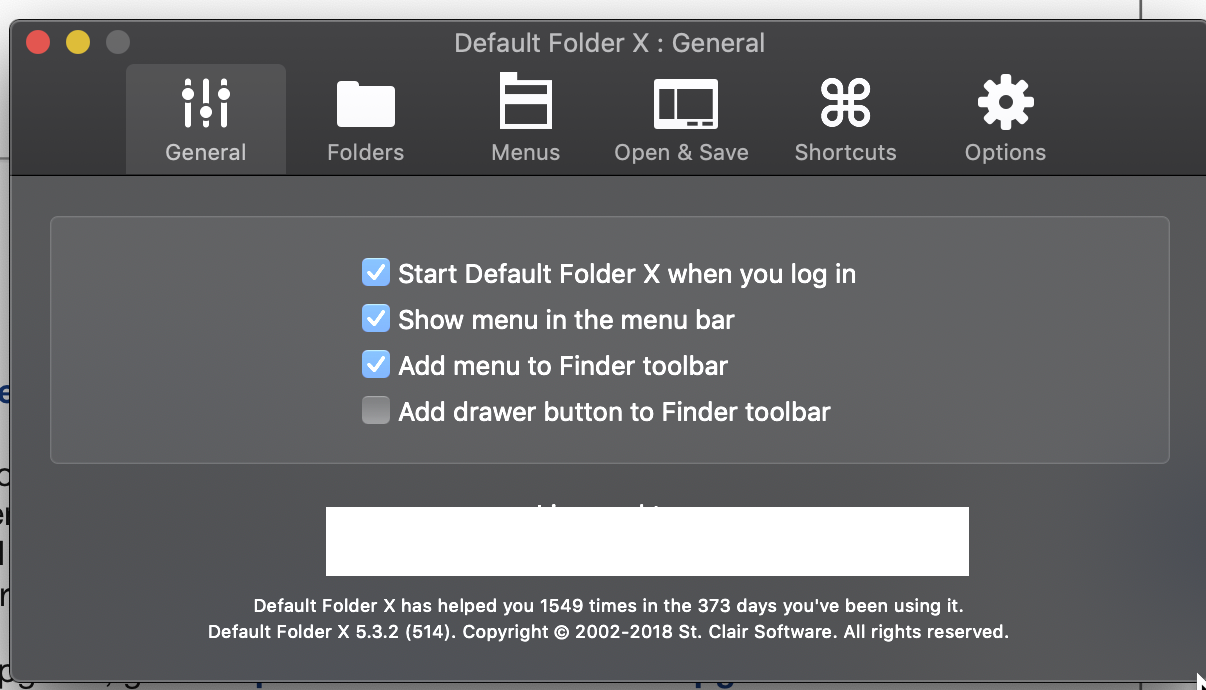
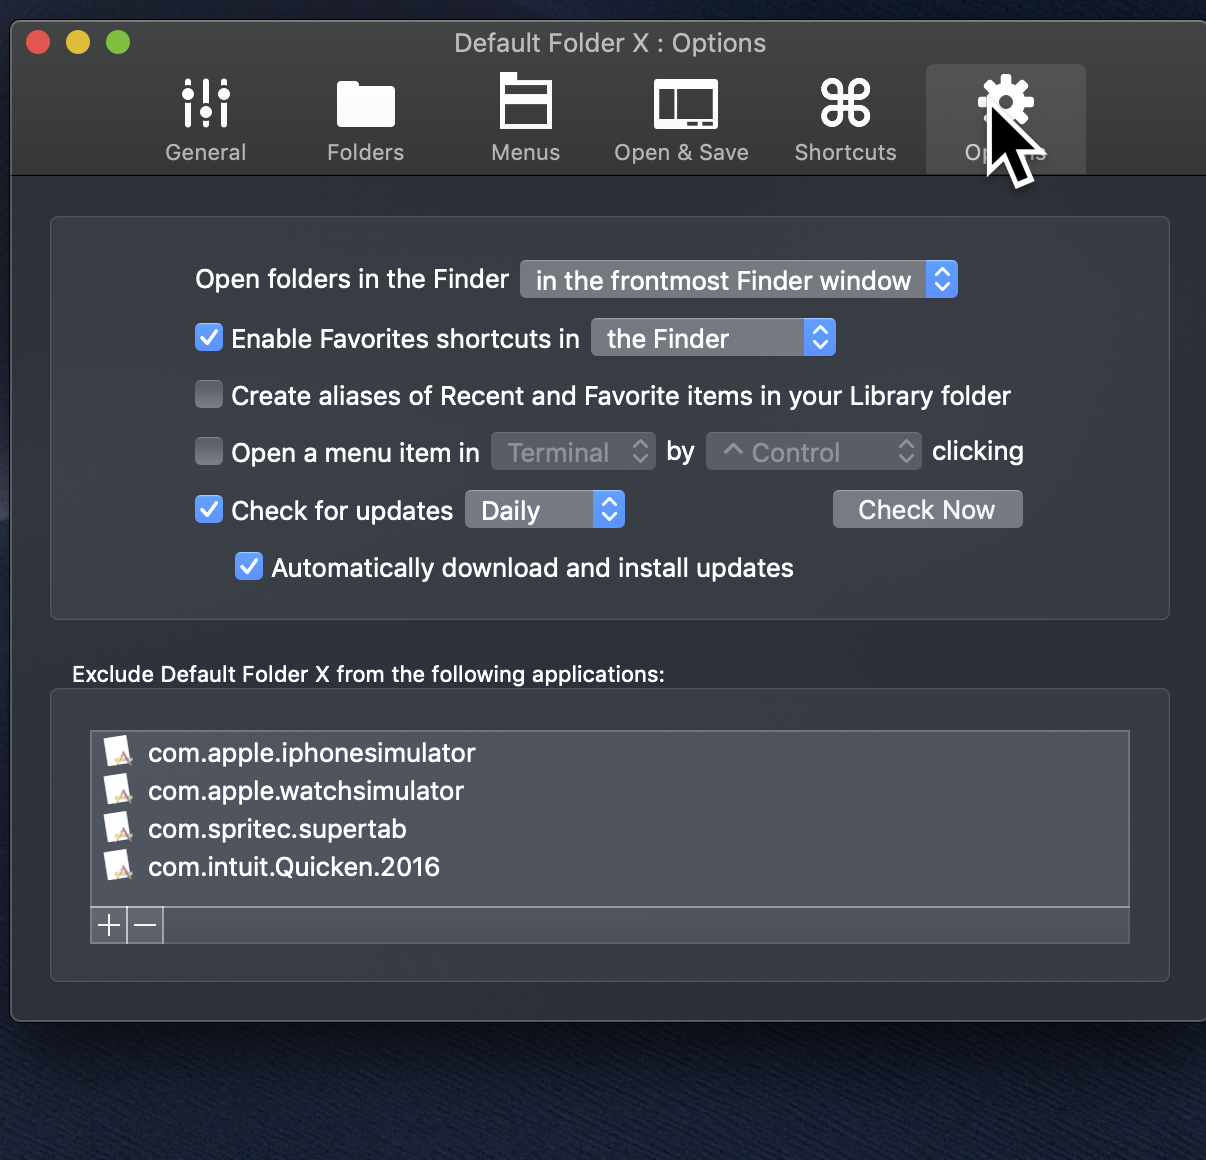
Default Folder Settings
Until Apple returns basic functionality to the dumbed down versions of 2013 iWork products, here is how to return the defaults to the 09 iWork versions.
The following example is for Pages, but works with Pages, Numbers, Keynote …
1) In the /Applications folder delete Pages.app and empty the trash
2) select any Pages data file (from your Documents Folder for example) and press Command+I
3) In the Info Panel, select “Open with -> Other”, then select Pages.app from the iWork 09 Folder.
4) Test by double clicking on a pages document. .doc and .docx file extensions will need to be applied in a similar manner if you want pages to open those document (rather than MS Word).
Note: Software Update will still download the updates for 2013 iWork products, this does not seem to cause issues.
A few quick notes on how to change the Print to Web Receipts Folder for Dropbox:
In Finder:
Go to \Library\PDF Services
Add alias “Save PDF to Dropbox Web Receipts” pointing to DocumentsDropbox\Web Receipts
All web receipts will now be synced via Dropbox.
Inspiration for this came from The technical times of Michael Andrews:
OSX has a nice button on the the print dialog box labeled “PDF”. This allows you to open, fax, and save any printable document as a PDF. One item on the menu is “Save PDF to Web Receipts Folder”. I use this when making purchases online. It will save the web page that contains my confirmation number and receipt as a PDF file to a folder (automatically created) called “Web Receipts” located in the “Documents” folder. This is fantastic as I do not need a hard-copy.
Recently I have found the need to access these receipts from multiple computers and mobile devices (especially wen traveling). Luckily OSX makes it easy to add a new “save” location to the PDF button on the print dialog. All you ned to do is add an Alias to the destination folder in your Library/PDF Services directory. Here’s how I added a new menu item to save PDFs to a new Web Receipts folder located in my Dropbox Documents directory. Using the Terminal, I did the following (note: you can do all this via Finder as well):
% cd ~/Documents
% mv Web\ Receipts ~/Dropbox/Documents/.
% cd ~/Library/PDF\ Services
% ln -s ~/Dropbox/Documents/Web\ Receipts Save\ PDF\ to\ Dropbox\ Web\ Receipts\ Folder
That’s it. Your current receipts are now in your Dropbox Documents folder, and there is a new menu item labeled “Save PDF to Dropbox Web Receipts Folder” on your print dialog’s PDF button.
Enjoy!
I was quite honoured to win best in show for one of my Palouse shots – Farming Chocolate. Read all about it.

Day 1 – Monday May 27, Bryher arrives at the island. He travelled really well and didn’t make a fuss. What a handful! Full of beans – he has consumed our entire life – with a Terriers energy and boldness. Healthy, happy and very bright – I am totally amazed at how fast he learns. His Mom has a tan head and white body – pictures below. Wire Fox Terriers typically are born with darker heads that turn lighter as they age.
We are using the crate system to house train him, and we have learned the hard way, make sure everything is done before letting him loose into the pen. He can play by himself with just passive supervision in the pen.
Will start getting him used to the house while supervised on a leash – expecting that to take a month! The first night he cried a bit and then fell asleep.
Day 2- – starting to sit when he wants something like a treat. He figured that out almost immediately. Slept well right though the night or if he needs he asks to go out around 3:00 am. We struggle to keep up. A couple of misses with the house training – I let him play in the pen without taking him out first, and well I won’t do that again. Talked to Peter and Dennis and will be keeping him in crate till we take him out and he ‘goes’ before letting play in the pen. Also giving up on the feeding by hand, he won’t develop a schedule when fed all day. We need to anticipate his needs and get him out before hand. Live and learn.
Day 3 – I put a canoe out on the dock, expecting him to be wary of it – but he hopped right in. Starting to get his paws wet at the waters edge, exploring boats and the dock. Fearless – if he can’t get down the steps on the front porch, he just does a “jeronomoooo” and jumps off – falling about 3 feet without missing a beat. We try to control him but what a handful, sometimes he is just out of control if left to run too much.
IOS:
Plug the iPhone into the Mac using USB. This will charge it while the phone offers tethered service. (Bluetooth should also work but will drain the battery quickly).
Turn on Personal Hotspot
On the Mac
System Preferences>Sharing>Internet Sharing
Share your connection from : iPhone USB
To Computers Using: Wi-Fi
Wi-Fi Options …
- Provide a network Name: “My Tethered Network”
- Select a Channel: something unique such as 36 is better than default 11
- Security: WPA2 Personal
- Password: something 13 characters long exactly and same again in Confirm Password.
Click “On” for Internet Sharing –
On other devices you should now see the “My Tethered Network” and be able to connect from other devices.
Make sure to set your sleep appropriately on the Mac, otherwise it may go to sleep mid session.
